Saturday, February 22, 2014

Veggie Momos (Dumplings)

Ah! Momos. The first time I ate momos was ages ago, in Dharamshala, Himachal Pradesh. Dharamshala is my husband's home town. Coincidentally, my sister lives in Dharamshala and happens to be my husband's grandmother's neighbor. My cousin, Ritesh (whose home is also in Dharamshala), introduced me to it while I was there on vacation once. I've been in love ever since. During those days, there were no momo vendors in Delhi or Dhaka (where I used to live at that time). Now, there are momo vendors all over Delhi and Gurgaon. 


If you didn't know, momo is a type of dumpling native to Nepal. It is also native to the bordering regions of Tibet, Bhutan, Sikkim, Darjeeling district and Northeast India. Dharamshala is the centre of the Tibetan exile world in India and I'm guessing it's the Tibetans who brought the momos to Dharamshala. 

There are some Tibetan restaurants in Utah, but they're like in Salt Lake City or farther. Well, I figured out a quick and easy way to make it at home and it tastes great!

Ingredients:

For momo filling
1/2 cabbage
2 carrots
1 green onion
a bunch of cilantro
salt to taste
1 tsp soy sauce

For momo wrapper
This is what I used 


Now if you don't have access to the won ton wrappers, you can make a regular dough with flour and water and knead it really thin. The problem with this step is, it is hard to roll it out really thin. If you don't roll the dough thin enough, the momo tastes doughy and hard around the edges and it's just no fun. Unless you're a pro at rolling, I would suggest getting ready-made won ton wrappers or spring roll wrappers (whatever is available). It is also way faster.

Also, look at youtube videos on how to roll the dough. It is apparently supposed to be thick in the middle and thin around the edges. Youtube videos will also explain how to wrap the momo. 

For Chutney
9-10 dried red chilies
4-5 cloves of garlic
1/2 tsp of roasted cumin powder
Juice of half a lime
Salt to taste

Method:

1. Take all the vegetables and chop them up really tiny in a food processor.


2. Add salt and soy sauce and mix it well. I had chili soy sauce so I used that, but regular soy sauce will work.


3. Now take a wonton wrapper and spread a little water on the edges (for sealing). Take a spoon of the veggies and put it in the middle.
I originally had square shaped won ton wrappers and I bothered cutting them into round shapes. Eventually, I realized that it works just fine with square shaped wrappers, too.
4. If you're not sure exactly how to seal the wrapper, take a look at some youtube videos. Just type "How to wrap a momo" in the search bar and you'll get all sorts of videos. 


I'm no pro, so these don't look perfect, but they will cook and taste perfect in the end. Make sure that when you scoop a spoon of veggies on the wrapper, you squeeze out all of the water. Cabbage, carrots, cilantro with soy sauce - they let out a lot of juices. If you try to put a scoop of really watery veggies, the water will keep oozing out when you try to seal the momo and it just gets tedious after a while to seal it properly. So just grab a spoonful of veggies in your hand and squeeze out all the juices. Then place them on the wrapper and seal. 

If you have a larger wrapper, put more veggies. Eventually, you'll figure out how much you can stuff into a wrapper.

5. Now grab a veggie steamer, spray it with oil (to keep the momos from sticking), put all the momos in it and put it in a vessel that has enough water in it to make steam. Heat up the water and cover the vessel with a lid. In a few minutes, it'll begin steaming.

 You may use any other steamer. Some people use idli stands. Whatever works for you.


Make sure you spray the steamer with oil and leave a gap between each momo. Momos tend to stick to the bottom and to each other. 

6. Once it begins steaming, the momo wrappers will start turning translucent. It should take about 15 minutes or so for them to be completely cooked. 

7. When they all look translucent, they are done cooking and ready to eat. While they cook, prepare the chutney. For the chutney, take dried red chilies, soak them in hot water and microwave it for two minutes. They say you should leave the chilies in the water and soak for 30 minutes, but waiting is not my thing. I just microwave it. The whole idea is to get the chilies to be soft enough to grind into a paste. Microwaving does the same thing as leaving it in warm water for half an hour.

8. Slice the garlic.

9. Roast some cumin and grind it. Make sure not the burn the cumin while roasting it. It should just be a dark brown color. If it turns black, you've roasted too long. 


10. Now add the red chillies and grind.

11. Now add 2-3 tablespoons of water and garlic.

12. Now add a teaspoon of salt (or more depending on your taste) and the juice of half a lime. Grind everything together. Chutney is ready.

13. During this time, the momos should be ready, too.


Ready to chow!

Give it a try :)

xx

Friday, February 21, 2014

Back from the Dead

Hello!

I'm back after like... forever. My laptop started to become a pain in the rear last year and I completely stopped using it. And writing a blog from my phone was no fun. Well, for Christmas last year, my husband bought me a beautiful, new laptop. I love it. I had almost forgotten how it felt to have a computer that worked this fast. This laptop has a core i5 and is the fastest laptop I've ever owned. Oh, how I love it. 

So, last night, my husband said "Why did you stop writing?" and I thought "Hey, I have a new laptop now, I should start again." So here I am. 

I have way too many updates since last July. 

The biggest and the best news: We bought a house! We moved in on the 1st of September, 2013. 


This is my palace.
I love living here. The house is so homey and comfortable. It has a basement as well and is probably the only basement that I'm not afraid to go into when I'm alone at home. I looove my kitchen. I cook way more than I used to now. There are 4 bedrooms, 3 bathrooms, a huge store area which we can convert into a 5th bedroom if we really like. But I like it as it is. Ankit bought a pool and pingpong table. I'm learning to play both. I'm getting good at table tennis. Pool is still a mystery to me, but Ankit is teaching me. He plays both reaallyy well. But it's nice to be able to go down into the rec-room and play whenever we feel like. 

I've really enjoyed decorating the place and just being here. I love it. I love my home. :)

This year I had like 80 kids come home for trick-or-treating and I absolutely loved it. And on the night of Halloween, Ankit's parents came from India to spend some time with us. It was the best time I spent in a long time. Just having parents at home everyday was so great. After they left, it felt so weird being lonely again. 

We celebrated Diwali together
 in our new house
Ankit et moi


In November, we took a trip to Southern Utah and visited Bryce Canyon and Zion National Park.
At Zion National Park (duh)

Us in Bryce Canyon (duh again)

We hiked from Sunrise Point to Sunset Point at Bryce Canyon. In between, we crossed Thor's Hammer and clicked lots of pictures, so that was nice.

In Zion's, we did the Angel's Landing hike. It is a 2.4 miles hike one way and uphill the whole time. Needless, to say, I stopped hiking the last half mile of the trail because it was way too freaky for me. There was no trail, it was just chains and climbing a rock. Even if I did climb it, I would have never made it back down and considering that eight people died doing this, it was a no-no for me. Ankit and my Father-in-law did it. My mother-in-law and I waited for them at Scout's Lookout. All the way to the top is 5,790 ft. So I did hike up to about 5,200 ft. The final half mile is almost 500 ft in elevation. It took us about five hours to do the hike up and back.

This happens to be around the end of the hike. So you can get an idea of how high up we were.

It was a really fun weekend trip. I'm surprised I hiked so much without killing myself. The first time I hiked in Yellowstone (which was way shorter than this one), I thought I was going to die. 

For Christmas, Ankur Bhaiyya and Astha came and stayed with us for over two weeks. It was the most fun time I've had since Hawai'i. I decorated the fireplace and my Mum-in-law bought me loads of ornaments to put on my Christmas tree. It was fantastic.

My Merry Little Christmas

I spent hours making the stockings with our names on it and started buying and packing gifts since November. On the night before Christmas morning, I sneaked out and put all the gifts under the tree. In the end, it really was no secret who Santa was. Haha.

Christmas Morning
In the morning, when everyone opened their gifts, the smiles on their faces made it all worth the effort. It was (by far) the best Christmas ever!

New Year's Eve
Fortunately, we all got to celebrate New Year's eve together. We had a dinner party at home and invited some of our friends to come celebrate with us. The food that night was delicious!


Since this was our first Christmas and New Year's as a family, we decided to get a family photo taken. I'm going to get it framed soon. 


I like this picture, too. Ankit is not a fan. He didn't like the photography very much. These are from Target. Hopefully, next year we'll find a better photographer in Tulsa. I hope to be in Tulsa next year for Christmas and New Year's. Fingers crossed. :)

Then our time together came to and end and everyone left. It was really sad. I could have gotten used to having everyone around. Felt weird sitting alone in the family room with no family. Ankit's holidays came to an end, too and he started going to work. That's when I really started to feel lonely.

But I'm excited again. My parents are coming here in April. They bought their tickets yesterday so I'm reaaally happy :D

We just celebrated Valentine's Day and it was great! I did some fun little things around the house, made chocolate truffles with Julia and baked a candy confetti cake that tasted divine. 


So yeah. Here is pretty much everything I've been up to since last July.

Until next time.
xx

Tuesday, July 16, 2013

Gobi Manchurian

So one day, I was sitting around and thinking about food (as usual) and suddenly, I had this bad craving for gobi manchurian. Gobi (cauliflower) Manchurian is an Indian-Chinese dish made with an Indian, spicy sauce with Chinese-inspired flavors.The first time I ate gobi manchurian was when I was in Manchester and my friend, Kanika forced me to go eat at a vegetarian restaurant. Gobi Manchurian was one of the dishes she ordered and it was sooo good. Well I decided to make it at home and it turned out pretty good! Here's the recipe...

Ingredients:

For Gobi
1 medium cauliflower, broken into medium-sized florets
1 cup all-purpose flour
oil for deep frying
1/2 cup corn starch
1 tablespoon soy sauce
2 inch piece of ginger, finely grated
1 green chili, finely chopped
2 cloves of garlic finely grated
1 teaspoon pepper
salt to taste
water to make batter

For Sauce
1/2 cup minced garlic
1/3 cup finely grated ginger
1 medium onion, finely chopped
4 Serrano Peppers (or green chili), slit
1/3 hot sauce (I used Sriracha)
1 bunch spring onions (separate the green and white parts)
3 tablespoons soy sauce
3/4 teaspoon brown sugar
1/2 tomato paste 
3 tablespoons sesame oil (or whatever oil you have. Sesame will be best)
1 teaspoon corn starch
salt to taste

Method:

1. In a pan of salted water, cook the cauliflower florets for only a few minutes. Don't let it cook all the way, otherwise, it'll lose its crunch. Pat dry with a towel and set aside.


2. In a bowl, combine flour, corn starch, salt, ginger, garlic, pepper, Serrano peppers and soy sauce.


3. Add enough water to make a thick paste.


4. Now take a pan or wok and heat enough oil for deep frying the florets. To check if the oil is ready for frying, put in a drop of the batter. If the batter swims right up to the surface, then it's ready. 


5. Now dip the florets into the batter and make sure it is well coated. Then place the florets into the oil for frying. 


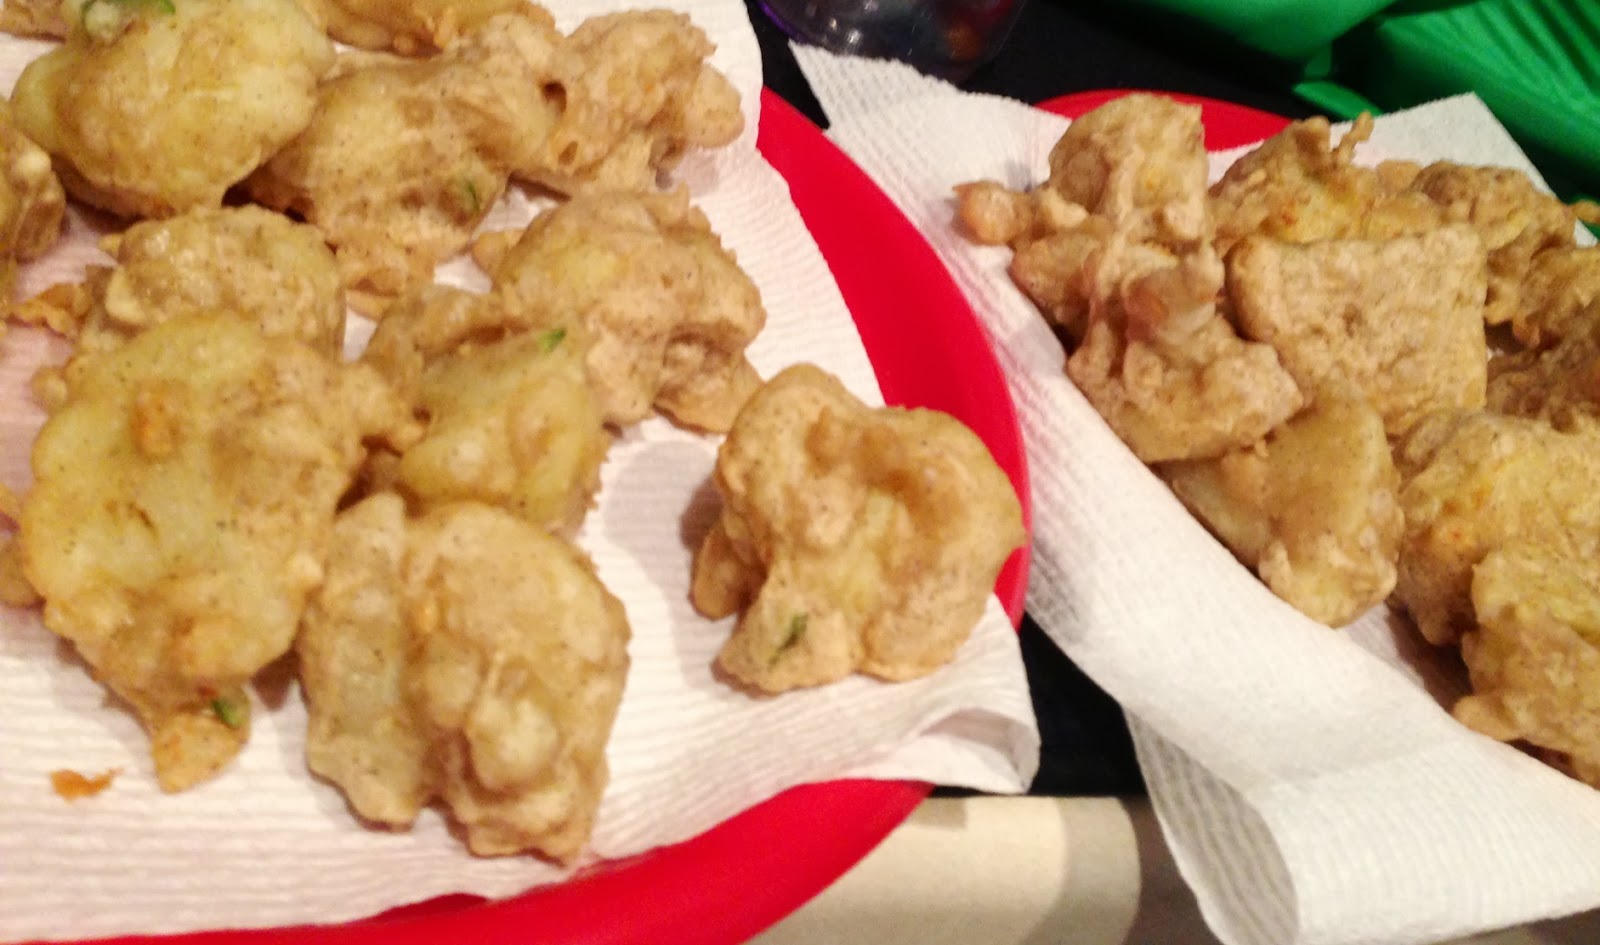
6. Fry them in batches. Don't try to cook them all together. Fry them until golden brown. I would suggest cooking them between high and medium heat. If you think the oil is getting too hot, decrease the heat a little because we need to make sure that it is being cooked from the inside too. Switch between high and medium accordingly. 


7. Remove and drain them on an absorbent paper.


8. Now make the sauce. In a bowl, combine tomato paste, hot sauce, soy sauce, brown sugar, salt and one cup of water.


9.Heat three tablespoons of oil in a pan (with a wide base to hold all florets in a single layer). Add minced garlic and grated ginger. Stir fry on high heat for a minute. Add the white parts of the spring onion, the chopped onions and Serrano peppers. Stir fry everything together until the onions become transparent.


10. Now add the sauce to this and simmer for about three minutes. Then mix corn starch with two tablespoons of water and add it to the pan. Simmer for another minute. Then add the florets to the pan and cook them at high heat while tossing them frequently until they are nicely coated with the sauce.


11. Turn off the heat when you start hearing a sizzle. Garnish with the green part of the spring onions. Serve immediately as an appetizer or as a side with noodles. 


I ate it with hakka noodles :D


Have a lovely day :)
xx

Mango Ice Cream Recipe

A friend of mine taught me how to make delicious homemade mango ice cream. It is super quick and simple to make. You'll be surprised at how yummy the ice cream turns out to be. It'll last over a month (if you don't eat it all up before that).

Ingredients:

30 oz/850 grams of mango pulp (I bought the tin can)


14 oz/396 grams of condensed milk (the little tin)


8 oz/226 grams of whipped topping (from the ice-cream section)


Method:

1. There's only one method. Mix all three ingredients well in a freeze safe box and let it freeze for five hours. 

The thing you need to make sure of is to taste check the mango pulp. If you think it is sweet, only pour half of the condensed milk. If its a little sour, add more. Taste check along the way. Don't pour the entire tin of condensed milk, it might get too sweet. Mix it up into a nice and smooth paste.


Let it rest in the freezer for five hours and then enjoy the yummy goodness :p


I made sponge cake and ate it with mango ice cream. Yummy yummy!

Have a nice day! 
xx